Electronics
The idea behind AvoBot was to create a low-cost robot which would allow to experiement with ROS and do SLAM and navigation.
Since it's a moving robot the wheels are kinda important, so I got JGA25-370 motors with wheels.
The quality is pretty good and they come with Hall-sensor encoders with is very convenient.
Initially I used L298n motor driver controller which does the job, but later switched to TB6612FNG which is much smaller and more efficient.
Probably the cheapest way to run ROS on a robot is by using Raspberry Pi.
AvoBot uses Raspberry Pi 3 Model B, but any other should work. Keep in mind that newer releases of ROS are only supported on arm64 so the RPi has to be able to run 64-bit Ubuntu.
Arduino Nano is used to control the motors and read the motor encoders.
Serail port pins are connected directly to RPi through a Logic Level Converter instead of a USB.
It allows to save space (no need for a bulky usb connector and a cable) and leaves the usb port free, so it's more convenient to update Arduino firmware.
The most expensive part of the robot is a lidar, but as far as lidars go RPLidar A1 is one of the cheapest ones with good software support.
Normally a separate battery is used for motors, but in my experience, a single 5v USB power bank is enough.
The only caveat is that even though RPi and motor driver are powered by different USB ports it's quite likely that they are not completely decoupled in the power bank which leads to dips in voltage when the motors are starting to move at high speeds.
To overcome this problem RPi power has 4 1000mF capacitors connected in parallel.
This stores enough power for the short power dips.
Still, if you try to run start stationary bot at 0.35m/s your RPi will restart,
but this can be easily overcome by setting speed limits in navigation configuration.
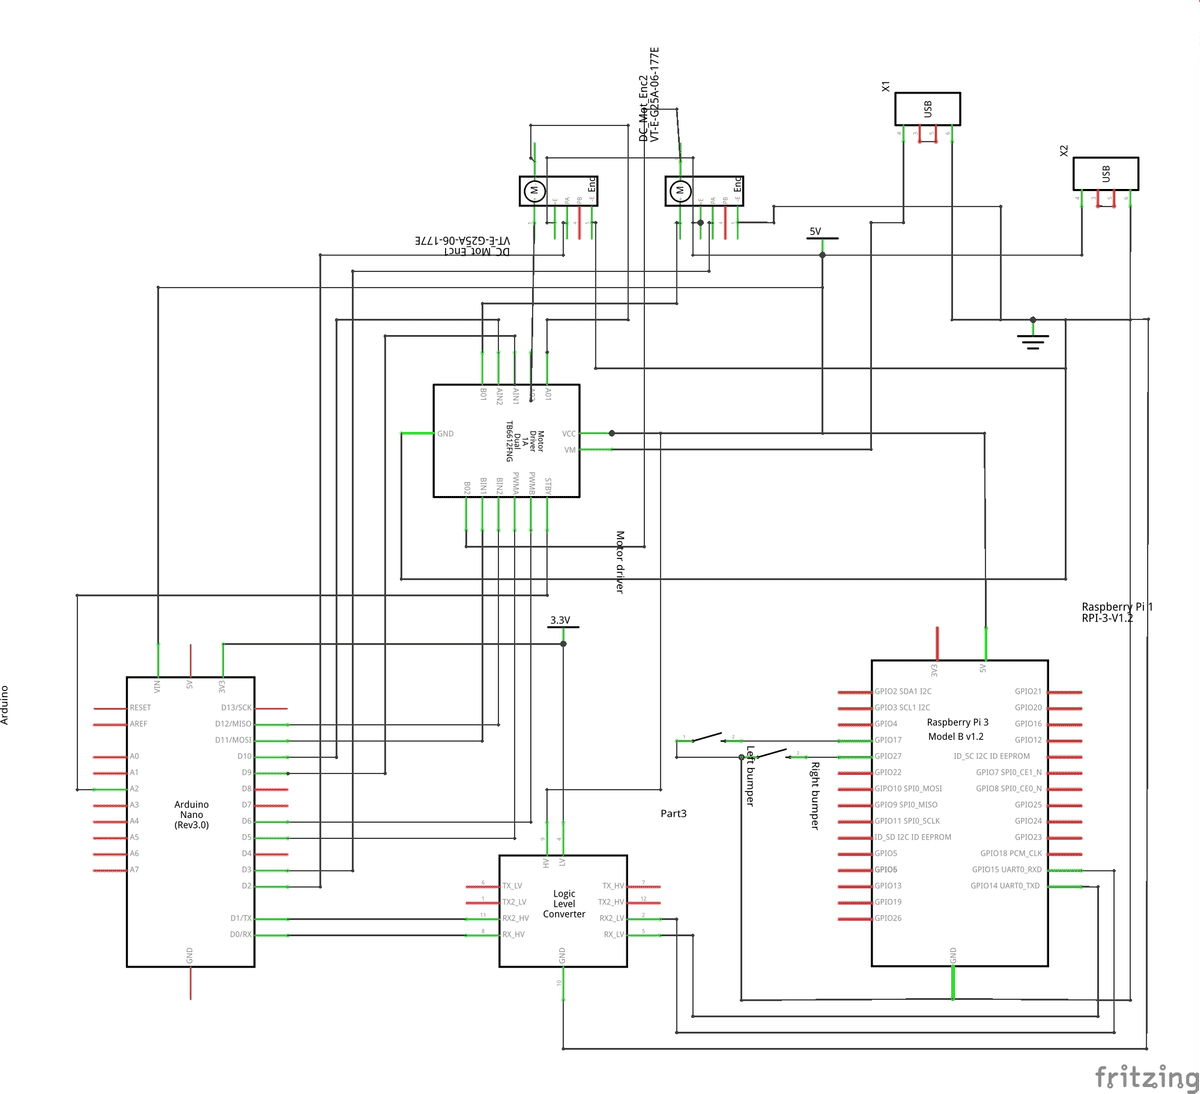
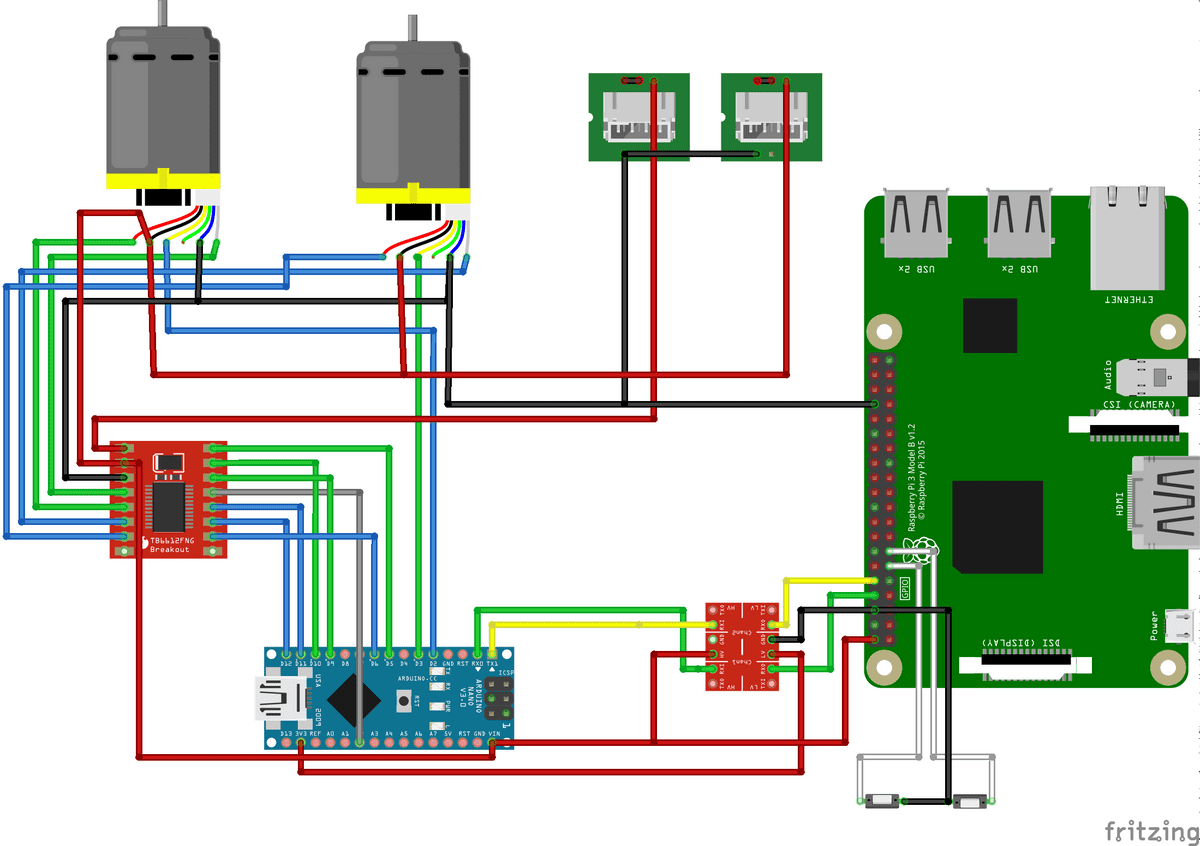
This is how everything is wired together:

Fritzing files and the code are here
